Saturday, 22 October 2011

Cute Little 1800s Blocks

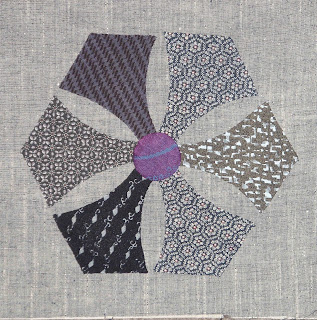
This is the next set of four 1800s blocks - aren't they so cute. A little too red as 
it turns out but they are scattered across the quilt they will be fine.


I already have two ladies booked in to start this Block of the Month early in the new year so
I need to get going. I have made 40 out of the total of 64 small blocks needed. 
Then there are nine larger blocks and a border - all appliqued or English Paper Pieced!! 
But I am loving doing this project. I am getting one set made in an evening if it has been prepared, so you do race through them quite quickly. It is a great project for a sense of achievement re progress.


It will be a great one for people to start over summer as you will be working on small pieces 
while I will probably be still quilting it - oooh that could be hot work at times.

Next I have to work on a cushion challenge from the Modern Quilt Guild. We all have a piece of the same fabric that has to be used in the cushion and it is a bit of a challenge and a bit of change of direction for me.  But that is all good.


Friday, 21 October 2011

Back to the 1800s

Now that the Japanese Quilt Block Quilt top is done and I have started quilting it, I have returned to some hand applique on the 1800s quilt. 


Maybe if I go in closer you can see the quilting!!!


 I am quilting with black King Tut thread outlining the applique blocks at this stage.

Now for the new 1800s block.


These were supposed to be English Paper Pieced. I did the first one this way and 
then decided to try Freezer Paper Applique and I must say that I prefer the Freezer Paper.
I guess I am just  a Freezer Paper junky!

Off to stitch a few more blocks as the Welsh play the Australians in the Rugby World Cup, 
so I have more to show you tomorrow.

Friday, 14 October 2011

Japanese Block Quilt

  My Japanese Quilt Block top is finished. It has been so much fun choosing blocks from 
Susan Briscoe's book "125 Japanese Quilt Blocks". All the applique blocks and the 
repeated pieced block came from the book.


I have used old kimono fabrics  It all started with a roll of kimono fabric that I picked 
up in the Flea Market in Japan several years ago. This roll had never been made into a 
kimono but had been around for a while. This is how you buy fabric for a new kimono -
 in a 13" - 15" wide roll of about 13 metres. All through the project I wondered if I was 
going to have enough and look plenty left over - thank goodness.


But the other fabrics were all from scrap bags or smaller pieces that I had been 
given or collected over the years. And they too kept running out - what a fun challenge this 
quilt has been. I do think that sometimes having to make decisions like this when fabrics 
run out often makes the quilt more interesting - if a little stressful at times.


This is the fabric that I started with for making the blocks and if you look closely you can 
see that it didn't make enough blocks.

So this was added to surround the central block and a few random pieces were 
added to the border units..


Then of course that ran out too. So this was added to make the border units. 


Oh what fun, but I am really happy with how it turned out. It has been so good to get into 
these fabrics that I have been putting away for years to make something special and now
I think I have done it.

Now it is on the pin basting and quilting - I think the quilting will be a combination of machine 
and hand. Machine quilting in the ditch of the blocks and them hand quilting were it really shows. 
I am hoping it is going to be easy to hand quilt, but I suspect it may not be the best - it is a pretty tight weave, which made it great to machine piece with and hand applique onto it was fine, but hand quilting - we will see.

Thursday, 13 October 2011

Next Pin Cushion

Last night was Pin Cushion Club and this is what we made.


It involved fusible applique with lots of different embroidery stitches. 
And of course some more taupe fabric.

Saturday, 8 October 2011

Final Block

Well that is all the Japanese Blocks done for this quilt.
This last one is a variation on a Chrysanthemum Block from Susan Briscoe's book
on Japanese Quilt Blocks.


The Chrysanthemum is the kamon (family crest) of the Japanese Imperial family.

Now I need to choose some fabric for the borders - I want to continue the pieced 
block formation into the borders but don't have any of either of contrast fabrics left. 
So it will be a search through my dwindling stash of old kimono silks. 
The border may have to be scrappier than expected if I want to use fabrics from
my stash. I'll let you know how I get on.

Friday, 7 October 2011

Japanese Block

This is the second to last Japanese block needed for my quilt and it was a nice easy 
and quick one.


Isn't the Rugby World Cup great for getting a bit of hand sewing done!!! 
I just can't sit in front of TV without something to sew in my hands.

Maybe I will get the last block done while we watch England play France.
It is all prepared and ready to sew, so it should happen.

Sunday, 2 October 2011

Japanese Block - Knotweed

This is the next block from Susan Briscoe's book and it is called Japanese Knotweed. 


I did enjoy getting a little embroidery onto this block - I felt I needed another block or two to balance off another one with quite a bit of embroidery on (posted on 22 April).

Going back to find that was interesting - I posted the first Japanese Quilt Block on 10 April - what  a long term project this has been - time to get going and finish these blocks and start quilting it!!!!

Just two more to go I think. OK back to the sewing!


Saturday, 1 October 2011

Christmas Present Quilt

I have spent the last week making this cool 'modern' Christmas wallhanging.
It measures 32" wide by 60" long.


This Moda fabric range is called "Countdown to Christmas" and is designed by Sweetwater.
We will be finishing off making up the kitsets for this quilt on Monday


I outline quilted the presents and did straight lines in the sashings and borders. 
I used the width of my walking foot - half an inch - which made it easy to keep the lines parallel.Luckily the sashing and the borders were easily divisible by half an inch.


The binding is a red and white stripe.


I do love striped quilt bindings.


The back is a creamy plain which shows up the quilting and binding nicely too.